

With the latest volume for Flames of War Mid-war, we're back on to the Allied side of the ledger and now look at some more of the British Forces that fought in North Africa, this time the tank forces in support of the 8th Army.
Armoured Fist is going to allow you to field formations from the following:
7th 'Desert Rats' Armoured Division
- The Royal Wiltshire Yeomanry fielding the mighty Sherman.
- The Royal Scots Greys and their Grant's.
- The County of London Yeomanry fielding varying Crusader models, and
- The 8th Hussars and their Honey Stuarts.
6th 'Mailed Fist' Armoured Division
- 'Death or Glory' squadron comprising various tanks including Valentines and Crusaders.
78th 'Battleaxe' Division
- The North Irish Horse fielding the heavy Churchill tank
- The 40th (The King's) RTR and their Valentines
- The Rifle Companies of the Argyll and Sutherland Highlanders

You'll also have access to support options for all formations to cover you in terms of air support, artillery support and other facets of combined arms.
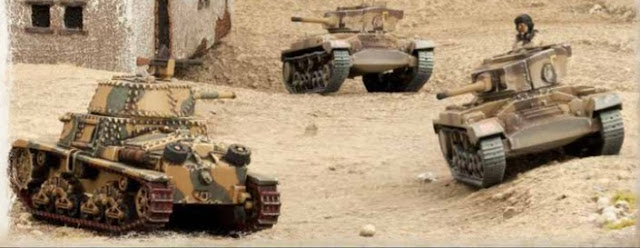
As we've come to expect from these volumes from Battlefront, they're decked out with fantastic colour shots of the forces in action as well as a bunch of historical information on the battles in the desert such as Gazala and the Battles of El Alamein.

Each of the different parts of the Divisions listed above allows you to field formations of specific British or American tanks in British service to suit your taste. From there you can select your support options as you'd expect.
If, for instance, you wanted to take a force of the might Churchill III (and with the coming plastic kits from Battlefront, why wouldn't you?!), then you're immediately looking at a North Irish Horse force to take these monsters.

While I won't be looking at each of the individual units in this article, I am going to take a look at what I think is my favourite; the Death and Glory Boys of the 17th/21st Lancers.
Like most other formations as part of V4 Flames of War, you have some compulsory choices to make here.
Your formation HQ can be made up of either:
- A Valentine III HQ with either 1 or 2 Valentine III tanks supported by 2 Crusader CS in both instances, or
- A Lee HQ with 3 Lee tanks.
From there, you must take:
- A Valentine III Death or Glory Troop of 3 Valentine III tanks, and
- A Crusader III Death or Glory Troop of 3 Crusader III tanks.


From there you have 2 more optional slots which you can fill with an additional Valentine III squadron or either another Valentine Squadron or another Crusader III Squadron.

I think the thing that excites me most about this one is the nature of how you play them. You just get straight up into your opponents grill with fast tanks like the Crusader while the highly armoured Valentines roll in behind to mop up.
You have to get them in there quick because they're Aggressive, meaning they're hit on a 3+ and while they have relatively good armour, you still need to make sure you have a few that make it through.
With a few carefully selected support choices, you really have the makings of a great force!

So, there's your introduction to Armoured Fist. Over the next few articles, we'll delve a bit deeper into some of the other forces at your disposal.
And don't forget.....the like it up 'em.
9th Armored Brigade (1 Sherman & 3 Crusaders)
ReplyDelete3rd Hussars (9 Grants, 12 Shermans, 16 Crusaders)
Royal Wiltshire Yeomanry (14 Grants, 10 Shermans,
13 Crusaders)
Warwickshire Yeomanry (14 Grants, 13 Shermans,
17 Crusaders)
This brigade was attached to the 2nd NZ Div . The 7th AD didn't have any shermans
I believe that the inclusion in the book is based on the 9 Armoured Brigade, 2nd NZ Div at El Alamein, so that would seem to match.
ReplyDelete@ Greg it just you have it listed as part of the 7th AD .
Delete