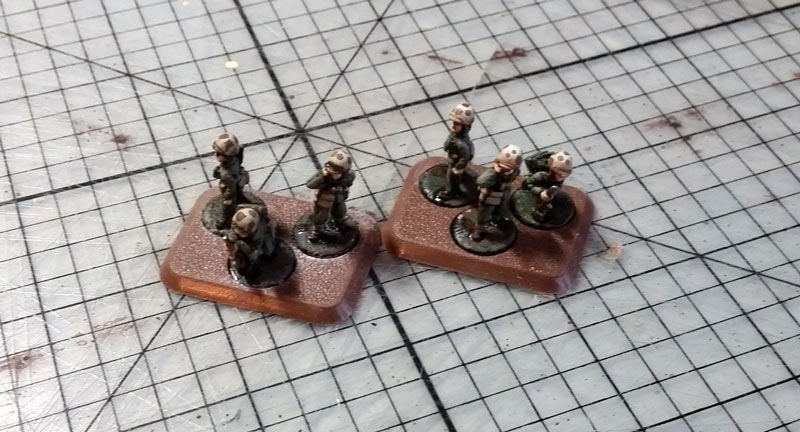
Showing posts with label Painting. Show all posts

27 February 2019

Flames of War - Basic Painting


A few days ago someone asked me "How do you paint like that?" and I thought to myself well I just do. This lead me into deeper thought and reflection about how far I've come. I don't just do I have learned over 20 years varying techniques and skills and those have now become part of my I just do.

I paint therefore I am

There are a few things I want to cover off before you even think to begin putting paint to miniature. First things first is that you have to want to paint if you're painting because you need to finish an army but you're not enjoying what you're doing what's the point. 

I was searching sarcastic motivational posters but this seems appropriate

Pick your paint times it's no good trying to start a project at 10pm on a school night. It's better to paint in the morning when the light isn't too harsh and the day is generally cooler and finally you will make mistakes this is life it happens to the best of us this is why ink washes exist.

     Don't do this

Ok on to the painting for this example we're going with one of Battlefronts new plastic Soviets, mostly because I have about 4000 of them and this helps get them done, they are a simple colour pallet and don't have too much additional equipment like a German grenadier. 


9 paints not including any ink washes, the miniature, a notebook where I document all my colour schemes (this has saved my butt so many times) and of course glasses because I am longsighted.

The colours I use are similar to what you used to buy in a boxset for each nation. I use Vallejo exclusively as they have the best range for military colours. The colours here are Black, Gunmetal Grey, Beige Brown, Medium Fleshtone, Flat Flesh, Khaki Grey, Khaki, US Field Drab and Russian Green. Not pictured is a simple black wash.

These are the backs of the paint sets I was talking about they are on Google and very handy

Ensure you miniature is primed before painting for most folks this is self explanatory but if you're new to miniature painting it may not be. This helps the paint stay on the miniature as it gives it something to grab rather than smooth metal or plastic.


Once that's done we'll move onto blocking in the main colours in this case it's a lot of Khaki Grey and some Beige Brown on the exposed flesh, Khaki on the webbing, Gunmetal in the gun bits and US Field drab on the canteen and SMG pouch.


Once completed it's time for a light ink wash what this does is add shadow to the folds in the miniature and darkens the main colour ready for highlighting.


The next step is highlighting the uniform what you want to do is hit the most raised parts in this case with 50/50 Khaki and Khaki Grey and working up to pure Khaki Grey on the very edges and pure Khaki on the edges of the webbing.


Now that's the uniform done and we're on the home stretch skin and faces. I've already done the the flesh areas with Beige Brown the next colour is Medium Fleshtone.
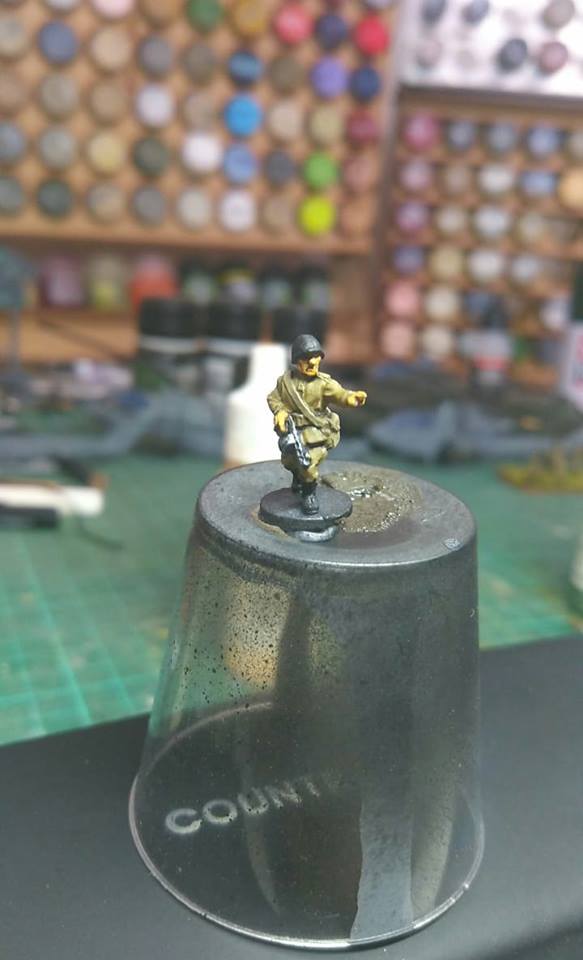

If you're feeling keen the try highlighting the raise parts of the face, cheekbones, nose, chin with Flat Flesh


And to finish is all off one helmet in Russian Green


Now it's done all that's needed is some matt varnish and his 200 or so friends to be painted the same way. I hope you have enjoyed this short tutorial as stated it was designed for people who are just getting into painting Flames of War or those folk who are a bit afraid of picking up a brush and attacking the 15mm scale. Remember to never stop learning.

28 March 2017

Project ACW Update - 28 March


What's that Johnny Reb? You ain't heard a peep from us Yankees in a while? Well, allow me to indulge you.

While a lot of our time of late here at Behind Enemy Lines HQ has been focused on our Flames of War V4 coverage and reviews, I've been studiously churning through the mountain of plastic and lead which makes up my 28mm ACW Union force and actually managing to get a couple of units finished off.

It looks like we've settled on 24 man units for our games and I understand that's reasonably standard for Black Powder so by that rationale I've got 2 full units based and ready to go.


I like the look of having two flags in the unit, especially when they're massing! All my models are painted in reasonably generic Union uniform. I hadn't planned on replicating any specific historical units at this stage to its seas of blue for me at the moment.

The models are mainly Perry plastics but there are also a number of (possibly) Peter Pig models thrown in as well for some variety. I do have a bunch of Dixon miniatures which I'm planning on using as I go.

And because man cannot survive painting infantry alone, I treated myself to a couple of cavalry models and a General for some painting variety...although in saying that, it's still seas of blue!


Again, the plastic cavalry are Perry plastics and the General is metal, also from Perry.

And lastly, what 19th century ACW would be complete without a cabin...


So there you have it. Definitely making progress but still a ways away from getting a full force ready for a game. Good things come to those who wait....


On the table at the moment, I'm testing my scheme for the Zouaves so hopefully the next update will see a couple of bases of those colourful gents ready for show!


26 May 2016

HIT THE BEACH!!!! Dan's 1500 Marines Ready to Rumble


Well I've finally finished and I'm going to play a game against Greg on the weekend. But first let's point out this beast and show you the pretty pictures.

HQ 2 x LVT(A)1 (37mm)   - 190pts


3 x LVT(A)1 (37mm)  - 285pts

3 x LVT(A)1 (37mm)  - 285pts

3 x LVT(A)4 (75mm)  - 205pts

Marine Rifle Platoon 3 x Rifle Squads with 2 LVT(4) Amtrac - 275pts


Marine Rocket Launcher Battery 3 x 4.5in Mk 7 with 5 crew - 105pts


Air Support Limited F4U Corsair - 150pts

So here we are ready to take the fight back to the Japanese this weekend wish me luck.


11 May 2016

Mike Paints! - Marines WIP

with Mike


Work's been nuts and my son's started to get really big into tanks, so as you can imagine, I've been pretty busy with those let alone giving my Marines the proper effort they deserve. Oh well, it's time to own up to my work in progress!

I feel as though I've broken the back of this project, with my main combat platoons and some critical support platoons done-ish. I say "ish" because I'm deliberately avoiding basing until I've got most of the project moved up to that point and I can then do them all in one go to maintain consistency and theme. So what's done?

Combat Platoons & HQ
I did these first because they represented the largest total WIP hours and the essential building blocks for whatever force I'll be making. I chose two full-strength platoons of 9x stands each (10 with HQ) so that I could take a section from each and merge them into a third platoon if needed. I also modelled them with the spare BARs which actually ended me up with something like six spare riflemen figures per platoon to use elsewhere (a pretty cool bonus).


Mortar Platoons
The USMC mortar platoon blister comes with the figures to make 4x mortar teams equipped with with either 60mm or 81mm mortars. There are unique loaders for the two tpes of mortars, but they share the rest of the crew figures. So, I grabbed a few spare US Army 60mm crew and three spare medium bases and made all seven mortars up.

In the foreground is the 60mm mortars with USMC loaders and "army" crew. The 81s in the back have all new USMC crew sculpts. The mortars themselves are on popsicle sticks until basing is complete.

Dog Handlers
These were a fun pair of teams to have painted up. They are three figures to a base, which will help them stand out when combat attached to the rifle platoons.


Combat Engineers
The USMC Assault Engineer pack comes with enough teams to field either the Assault Section (with 2x Bazookas, 2x Flame throwers, and 2x pioneer teams) or the Marine Engineer Assault Section with is 4x Pioneer teams and 3x flame throwers. So I'd recommend buying two of these packs to max out on flame-throwers.

The flame-throwers are two figures per small base, a departure from standard FoW flame-thrower teams. Like with the Dog Handlers, this will help distinguish them once they are combat attached out. Similarly, I only placed 3 pioneer figs on the pioneer teams so that I could identify them quickly as well.


75mm SPG half-tracks
These are my favorites so far! I used the current MW 75mm GMC pack for these models, added some stowage from my bits box and installed a bunch of extra machine-guns.


M5A1 Stuarts
These are the bulk of my tank assets until I get my Satans and M4A2 Shermans painted up. That said, three of these are well over 600 points! Again, I just used the standard US M5A1 boxed set.


All told the above rings in at: 1945 points (PW).


Where to from here?
Machine-guns, 37mm anti-tank guns, a couple of Shermans, and my LVT transports!

Oh, and my F4U Corsair, which is my prize at the end of the project!

09 May 2016

Damian Attempts to Paint Japanese Tanks

with Damian

So off I go- I’m actually pretty happy in this photo. No, seriously I am!
The hardest part about painting for me is that I’m naturally lazy and uninterested in the actual painting of my figures. To me, it’s all about getting the bare basics done so I can field a painted force on the table as quickly as I can. I love the assembly side of the hobby and playing is always a blast. But painting? Nope. However, I do have a few simple tricks and shortcuts to aid me when I sit down and paint my Banzai Sensha Rentai.

Now, as I don’t have access to an airbrush my painting will be sped up in the use of spray cans (As close a colour match as I can get to the recommended Vallejo colours), blutac masking of areas to get firm outlines when applying the camo patterns, light washes of either a watered down black or a light brown to simulate depth and a drybrush of a light almost white (or possibly bone) colour just to highlight the edges, and create an illusion of dust on the tanks.

In order to do this paintjob, I first referenced the painting guide on page 47 of the Banzai book. I like to have my options as varied as possible so I tracked down a few colour matches with the old range of Vallejo and tried to find a spray can alternative so I can simulate airbrushing! Another huge help was when a good friend David Greig sent me his link to painting his own Japanese tanks. I’m going to use it for inspiration and see how I go.

You can find it here- Dave's Sensha Rentai Paint Guide

Comrade khaki (326)-base colour
Old Vallejo= Green-Brown (879)
Spray can colour= SP06 German Armour Desert / Tamiya XF-60 DARK YELLOW

Boot Brown (323)-30% disruptive pattern.
Old Vallejo=Flat Brown (984)
Spray can colour=Tamiya X-9 BROWN

Army Green (342)-Third camo colour.
Old Vallejo=Reflective Green (890)
Spray can colour=Tamiya XF-58 OLIVE GREEN

1942- A simpler camo scheme was introduced to these tanks using the same colours without the yellow lines and utilising a larger proportion of green.

Cavalry yellow (361)
Old Vallejo= Flat Yellow (953)
Spray can colour= Tamiya XF-3 FLAT YELLOW
or    
Sicily Yellow (362)
Old Vallejo= (Green Ochre) 914
Spray can colour=Tamiya XF-59 DESERT YELLOW

I like to have my platoon commanders, and HQ tanks easily recognisable so they will have a combination of exposed tank commanders popping out the top hatch and have the flat yellow wavy lines on their tanks to denote their experience. It will also make it easier for my opponent (and myself!) to identify the platoon commanders and cut down on any deployment and/or LoS issues that may arise.


Running out of German Armour spray after 22 tanks (out of 40+!) is not a good thing. Many, many swears later and I bit the bullet to hit the paintbrushes. Luckily middlestone from vallejo is a perfect match.


Good old Dan, He still hasn’t realised I have his magic wash. I brushed on this homebrew mix all over the tanks to “make them pop” and give them base protection. They are ready for camo and tracks.


Next steps-Do my tracks with GW’s tinbitz. (Seriously, no other paint comes close to this for tank tracks. I’m going to cry when my last pot and a half runs out.) I’m going to use the colour set I scored through Mighty Ape to finish em off. No airbrush, just good old fashioned paint strokes *coff* drybrush- will soon sort these out.


The ships from the axis and allies boardgame I stole from Paul make great little objectives (a couple of different junk blues I just splashed on the base- vallejo stone grey and a white drybrush on the weenie boaties and they’re good to go) and represent naval air and guns perfectly. I’m still undecided whether I go with a white zero or green… I’ll worry about that after I crank some more tanks out of the painting factory.


I’m very happy with the camo scheme as it happens on these tanks… only 37 or so to go… And I’m not going to do my zero till I complete the tanks as a prize for sticking to it. Further updates later.

CU! 
-Damian.

06 May 2016

Dan's Marines WIP

with Dan


The Marines are getting ready to hit the beach! This week I've managed to find some time to catch up on painting and now it's all down to weathering and washing.


Marine Rocket Battery is done just needs a bit of grass and the base edges touched up I also managed to find the misplaced crew members hiding on a stick at the back there :( Overall I'm pretty happy with these mini's I only hope they are better at hiding the Soviet Rocket Batteries.


The Marines themselves have been ready and waiting for a while now. When it comes to painting I really enjoy painting the complex fiddly things first that way I can have fun painting the rest of the army.


I'm on the home stretch just washes to go on my LVT's it's been a fun project. The tanks are currently coated in a gloss varnish this will help me to move around my washes and clean up my mistakes.


As you can see on the 75mm I've gone with a 3 colour camouflage but left it simple on the 37mm LVT's. The tracks have been painted with a mixture of gunmetal and AK interactive dark tracks colour. 


On the back of the LVT 37mm are also two machine gunners who are wearing Mae Wests getting the right shade of yellow is important to me so I built this up with Vallejo Dark Sand and the cut it with Model air yellow to give a worn look.

I hope to have these completed by the end of next week ready for a game and a battle report. Meanwhile here's a video I made about painting the LVT's